Crop presets
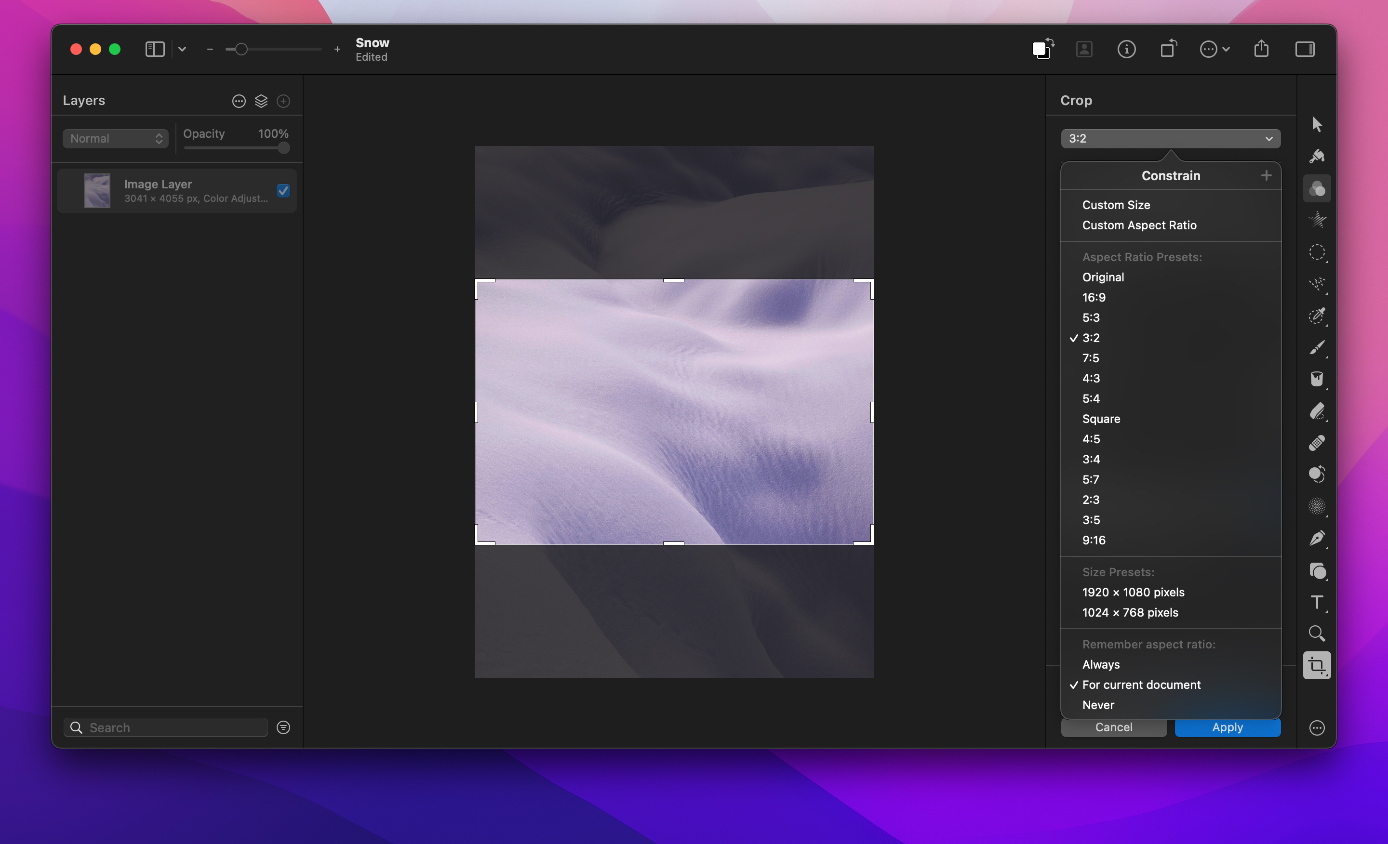
Pixelmator Pro comes with a number of pre-made presets you can use to quickly crop your image to a number of popular formats. You can also easily create your own presets to use in future projects.
Apply a crop preset#
- Choose the Crop tool by doing one of the following:
- Choose Crop
 in the Pixelmator Pro Tools sidebar.
 - Choose Tools > Crop from the Tools menu at the top of your screen.
- Press the
Ckey on your keyboard.
- Choose Crop
- Click the Constrain pop-up menu.
- Select one of the crop Ratio or Size presets.
Customize the crop presets#
- Choose the Crop tool by doing one of the following:
- Choose Crop in the Pixelmator Pro toolbar.
- Choose Tools > Crop from the Tools menu at the top of your screen.
- Press the
Ckey on your keyboard.
- Choose Crop
- In the Constrain pop-up menu, make sure the Custom Aspect Ratio is selected.
- Do any of the following:
- Save a new crop preset: Constrain the crop box to your required aspect ratio manually or by entering width and height values into the designated fields. In the Tool Options pane, click the Constrain pop-up menu and click Add
 at the top.
 - Rename a crop preset: Click the disclosure triangle next to the preset you'd like to rename and choose Rename. Enter a new name for your preset and press the
Return ↵key on your keyboard to confirm. - Delete a crop preset: Click the disclosure triangle next to the preset you'd like to delete and choose Delete.
- Reset all crop presets: Click the disclosure button next to any preset, press and hold the
Option ⌥key, and choose Reset All. This deletes any custom crop presets and recovers default ones.
- Save a new crop preset: Constrain the crop box to your required aspect ratio manually or by entering width and height values into the designated fields. In the Tool Options pane, click the Constrain pop-up menu and click Add