Fill with the Gradient Fill tool
The Gradient Fill tool fills layers with your chosen gradient — a gradual transition between multiple colors. You can choose from the gradient presets that come with Pixelmator Pro or create and save your own. You can also fill any layer with a gradient using the Gradient Fill effect.
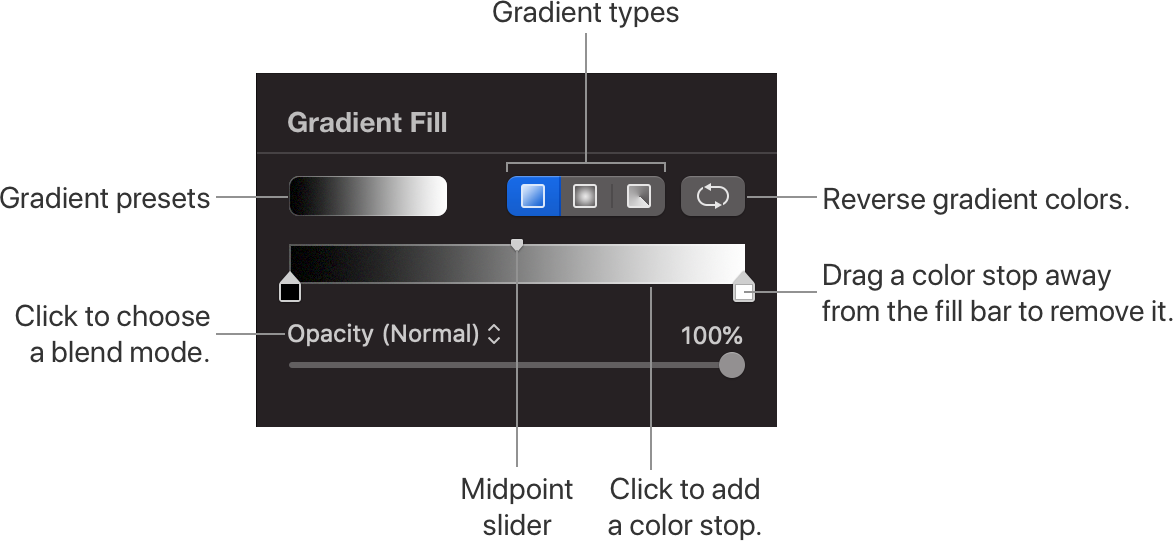
A gradient will always have at least two colors. Each color is represented by color stops on a fill bar. You can change how the gradient looks by adding or removing stops, adjusting their position, and setting the color and transparency of each.
- Choose the Gradient Fill tool by doing one of the following:
- Click Gradient
 in the Tools sidebar or choose it from the grouped tools.
 - Choose Tools > Gradient Fill from the Tools menu at the top of your screen.
- Press the
Gkey on your keyboard.
- Click Gradient
- Click the presets well to choose from the available presets or customize any selected gradient:
- Change colors: Click any of the existing color stops to open the Colors window and choose a new color.
- Add additional colors: Click below the gradient bar to add a new color stop.
- Remove colors: To remove a color stop, drag it away from the gradient fill bar.
- Reverse colors: Click Reverse to reverse the gradient colors.
- Choose a gradient type:
Linear gradient: Blends colors between color stops, all along a line.
Radial gradient: Blends from start to end in a circular pattern.
Angle gradient: Blends colors in a sweep.
- Drag on the canvas to fill the selected layer with a gradient.
If you'd like to discard all the current changes made with the Gradient Fill tool, click the Reset button at the bottom of the Tool Options pane.