Adjust hue, saturation, and vibrance
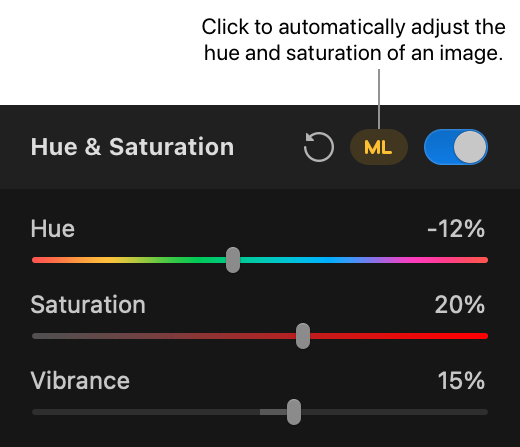
The Hue & Saturation adjustment lets you shift all the colors in an image along the color spectrum and increase or decrease their saturation and vibrance. You can also improve the hue & saturation automatically using the machine learning-powered ML adjustment.
You can apply the Hue & Saturation adjustment to a single layer or, using a color adjustments layer, multiple layers in a composition.
Edit the currently selected layer#
- Choose Format > Color Adjustments > Hue & Saturation from the Format menu at the top of your screen.
- In the Tools sidebar, click the Color Adjustments
 tool and turn on Hue & Saturation.
 - Press
Aon your keyboard and turn on the Hue & Saturation adjustment.
Edit multiple layers in a composition#
- Choose Insert > Color Adjustments from the Insert menu at the top of your screen and turn on the Hue & Saturation adjustment in the Tool Options pane.
- Click Insert a layer
 at the top of the Layers sidebar, choose Color Adjustments, and turn on the Hue and Saturation adjustment.
 - Press
Shift ⇧+Command ⌘+Aon your keyboard, and turn on the Hue & Saturation adjustment.
Shift all the colors in an image along the color spectrum#
Drag the Hue slider to the left or right to shift all the colors in the image along the color spectrum. You can also click the Hue value and enter a percentage from –100% to 100%.
Adjust the saturation of all the colors in an image#
Adjusting saturation makes every color more or less intense.
- Drag the Saturation slider to the right to make every color in the image more saturated.
- Drag the Saturation slider to the left to make them less saturated.
Adjust the vibrance of all the colors in an image#
The Vibrance slider targets only the most or least saturated colors depending on whether you’re increasing or decreasing vibrance.
- When reducing vibrance, the intensity of the more saturated areas is reduced, while the less saturated areas are less affected.
- When increasing vibrance, the intensity of the less saturated areas is increased, while the more saturated areas are less affected.
Press and hold the Option ⌥ key before dragging if you’d like to extend the range of the Vibrance slider beyond 100%. You can also click the Vibrance value and enter a percentage from –200% to 200%.
Automatically adjust the hue and saturation in an image#
The ML adjustment improves hue and saturation in your image automatically using a machine learning algorithm trained on millions of professional images.
Click the ML button in the Tool Options pane next to the Hue & Saturation adjustment to adjust the colors automatically.
Show before and after or reset adjustments#
Show Original: Click the Show Original button or press Control ⌃ + M on your keyboard to see what the image looks like without any color adjustments.
Show Split Comparison: Option ⌥ – click the Show Original button, press Control ⌃ + C on your keyboard, or force-click the canvas.
To reset all Color Adjustments, click Reset at the bottom of the Color Adjustments pane.