Create a new image
To create a new image in Pixelmator Pro, you can pick from a variety of gorgeous, pre-made templates and mockups, select from plenty of image size presets, or just create a new empty image from scratch by entering custom dimensions.
Create a new image in Pixelmator Pro#
- Launch Pixelmator Pro by opening it from the Dock, Launchpad, or the Applications folder.
- Do one of the following:
- In the Pixelmator Pro Welcome screen, click "Create a new document".
If the Welcome screen doesn't show up, choose Window > Welcome to Pixelmator Pro from the Window menu at the top of the screen. You can also press
Command ⌘+Shift ⇧+1on your keyboard. - Choose File > New from the File menu at the top of your screen.
Control ⌃– click the Pixelmator Pro icon in the Dock and choose New.- Browse a beautifully designed collection of templates and mockups for social media, print, and more, create a new empty using image size presets on the left, or create a new image with custom dimensions.
- In the Pixelmator Pro Welcome screen, click "Create a new document".
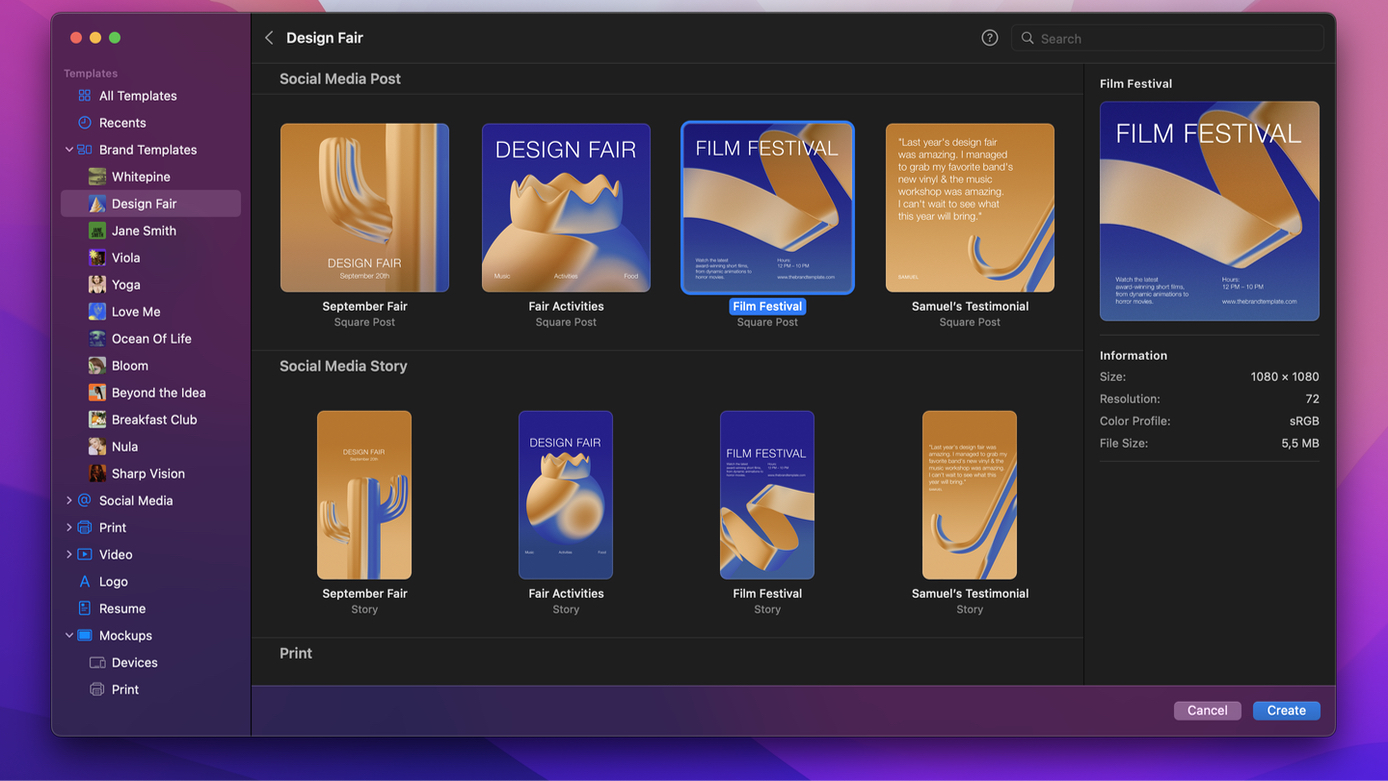
Create an image using an image size preset#
If you're looking to create a new blank image for a specific purpose, you can choose from a range of image size presets for web, photo, print, device, or more.
- In the template browser, choose All Templates then click the Preset pop-up menu in the sidebar on the right to open the preset browser.
- Browse the different preset categories to find the template size you need. You'll find the following preset categories: International Paper, US Paper, Photo, Web, Social, Film & Video, Iconography, and Devices.
- When you select a preset, you can also change the document orientation — portrait or landscape — in the sidebar on the right.
- Click Create or press the
Return ↵key to create a new document.
To create a new custom image size preset:#
- In the template browser, choose All Templates, then enter your new image dimensions into the sidebar on the right.
- Open the preset browser in the sidebar on the right, then click Add
 to save a new preset.
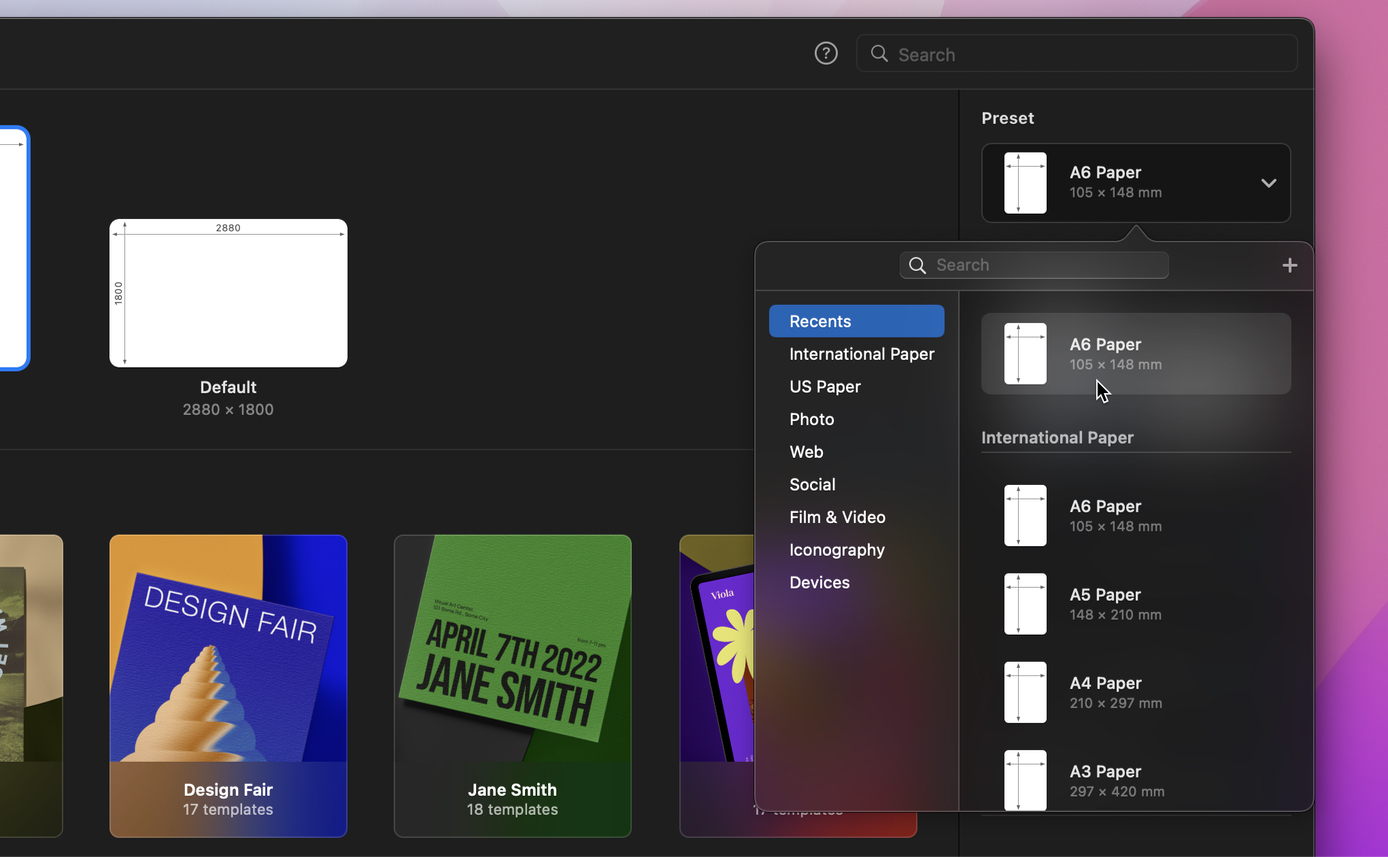
If you don’t want to keep the new preset, Control ⌃ – click it in the preset browser and choose Remove. In the same menu, you can also rename, duplicate, redefine, or reset templates.
Create an image with a custom size#
- In the sidebar on the right, choose the document orientation or choose the measurement units, resolution, and color depth from the pop-up menus.
- Enter the width and height of the image.
- Click Create or press the
Return ↵key to create a new document.
Create an image from the clipboard#
The new image will be created using the image you have saved to the clipboard. The clipboard is a macOS feature that contains the last thing you copied on your Mac — if it’s an image, the clipboard option will appear in the template browser. If it's text or something else, that option will not be shown.
- On your Mac, iPhone, or iPad, copy an image to Clipboard.
- Open Pixelmator Pro by clicking the Pixelmator Pro icon in the Dock, Launchpad, or the Applications folder.
- Do one of the following:
- In the Pixelmator Pro Welcome screen, click Create a new document. If the Welcome screen doesn't show up, choose Window > Welcome to Pixelmator Pro from the Window menu at the top of the screen.
- Choose File > New from the File menu at the top of your screen.
Control ⌃– click the Pixelmator Pro icon in the Dock and choose New From Clipboard.
- In the template browser, choose the Clipboard option.
- Click Create or press the
Return ↵key.
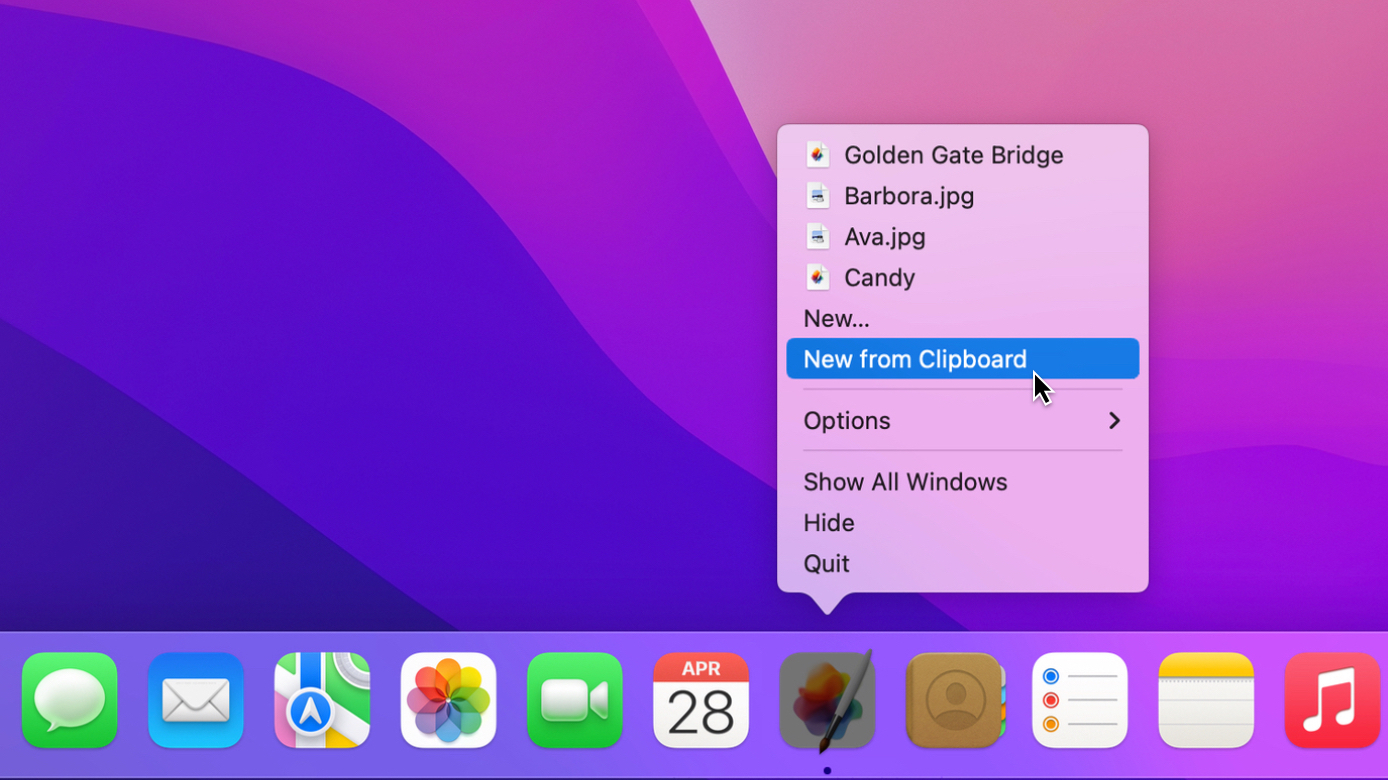
And, with Universal Clipboard, you can even copy media on one Apple device and create a new document in Pixelmator Pro on another.